How to Pass Data from Parent FlexCard to Child FlexCard in OmniStudio
In this post, we will learn how to pass data from a Parent FlexCard to a Child FlexCard in OmniStudio (Vlocity). We will create two FlexCards—one parent and one child—where the child FlexCard queries Account records and displays the data inside the parent FlexCard.
This approach is commonly used to build modular, reusable, and dynamic UI components in Salesforce OmniStudio.
Ways to Pass Data to a Child FlexCard in Vlocity
There are two primary ways to pass data from a parent FlexCard to a child FlexCard:
1. Using Data Nodes
Data Nodes are used to query Salesforce data and pass the results to a child FlexCard.
Data Nodes fetch records using SOQL, DataRaptors, or Integration Procedures
The queried data is automatically available to the child FlexCard
Best suited when the child FlexCard needs record-based or structured data
2. Using Attributes
Attributes act as input parameters passed from the parent FlexCard to the child FlexCard.
Attributes enable dynamic customization
Specific values can be passed directly to the child FlexCard
Useful when the child FlexCard needs filtered or contextual data from the parent
Using attributes allows us to pass specific values from the parent FlexCard to the child FlexCard efficiently.
Step 1: Create the Child FlexCard to Query Account Data
In this step, we create the child FlexCard that will query Account records.
Create a new FlexCard with a proper Name and Description
Configure a Data Source (SOQL, DataRaptor, or Integration Procedure)
Query the required Account fields such as Name, Phone, or Industry
Save and Fetch the data
Drag the required fields from the Build section to the canvas
This child FlexCard will be responsible for displaying Account-related information.
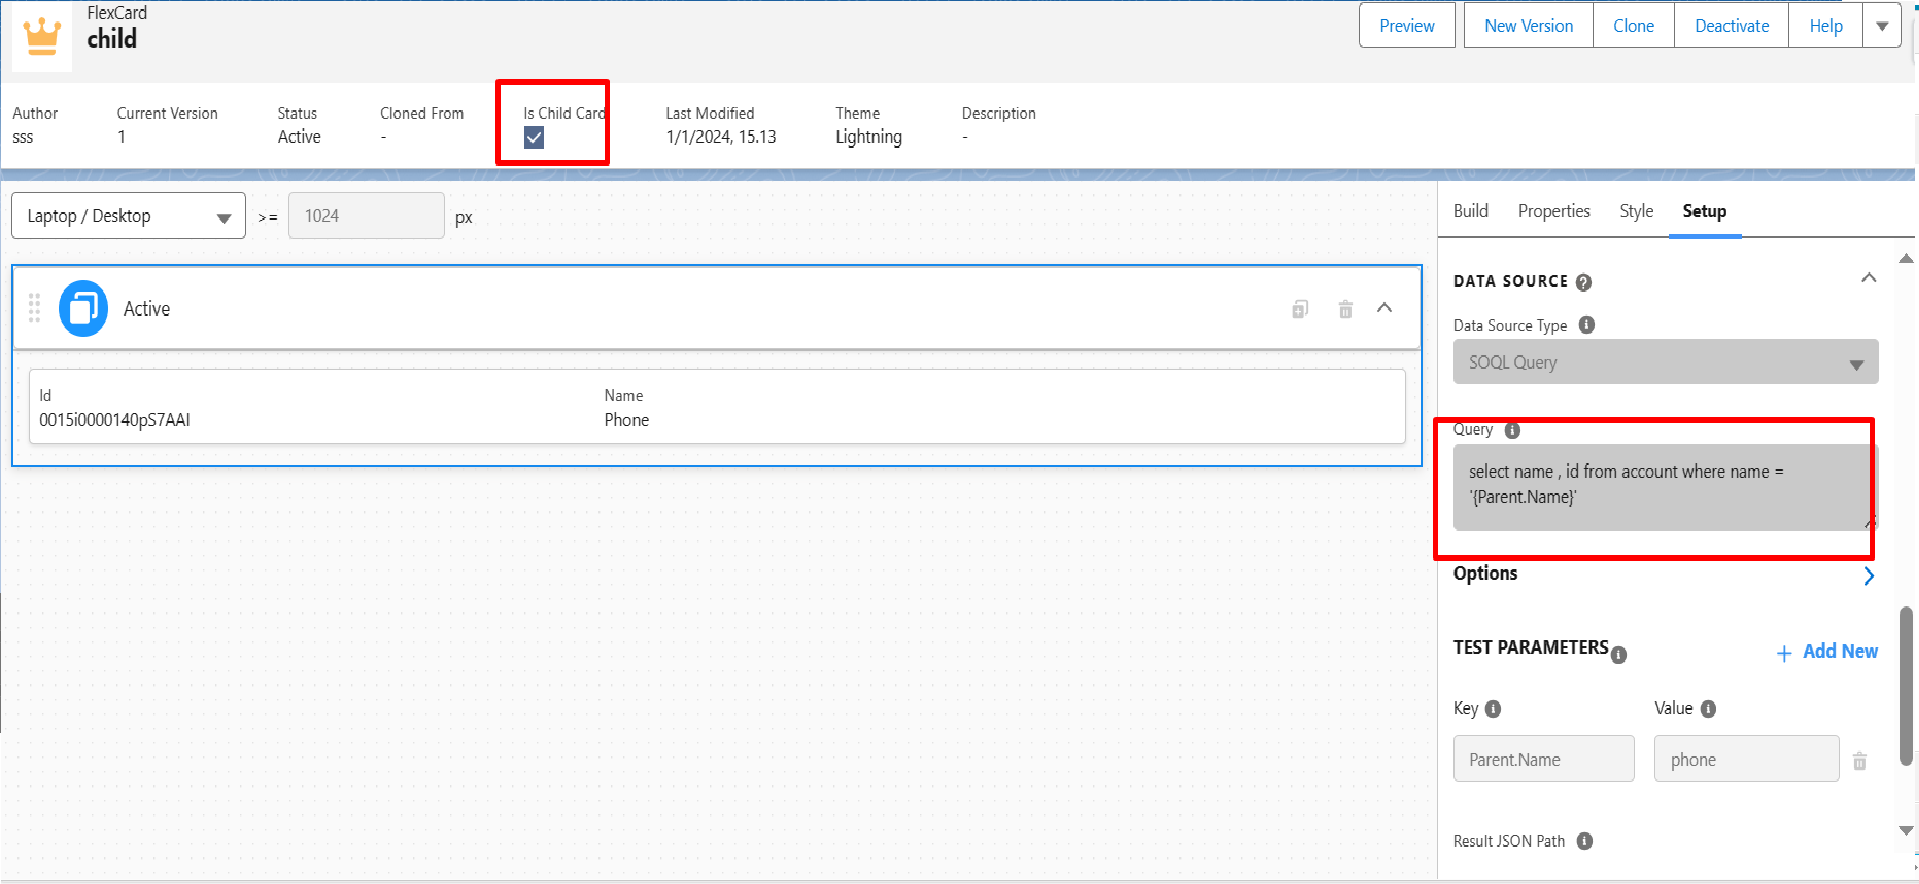
In Child FlexCard
Step 2: Enable Child Card Settings in the Child FlexCard
To establish a parent-child relationship:
Open the child FlexCard settings
Set “Is Child Card” = true
Save and Activate the FlexCard
This step is mandatory; without enabling the child card option, the FlexCard cannot be embedded inside a parent FlexCard.
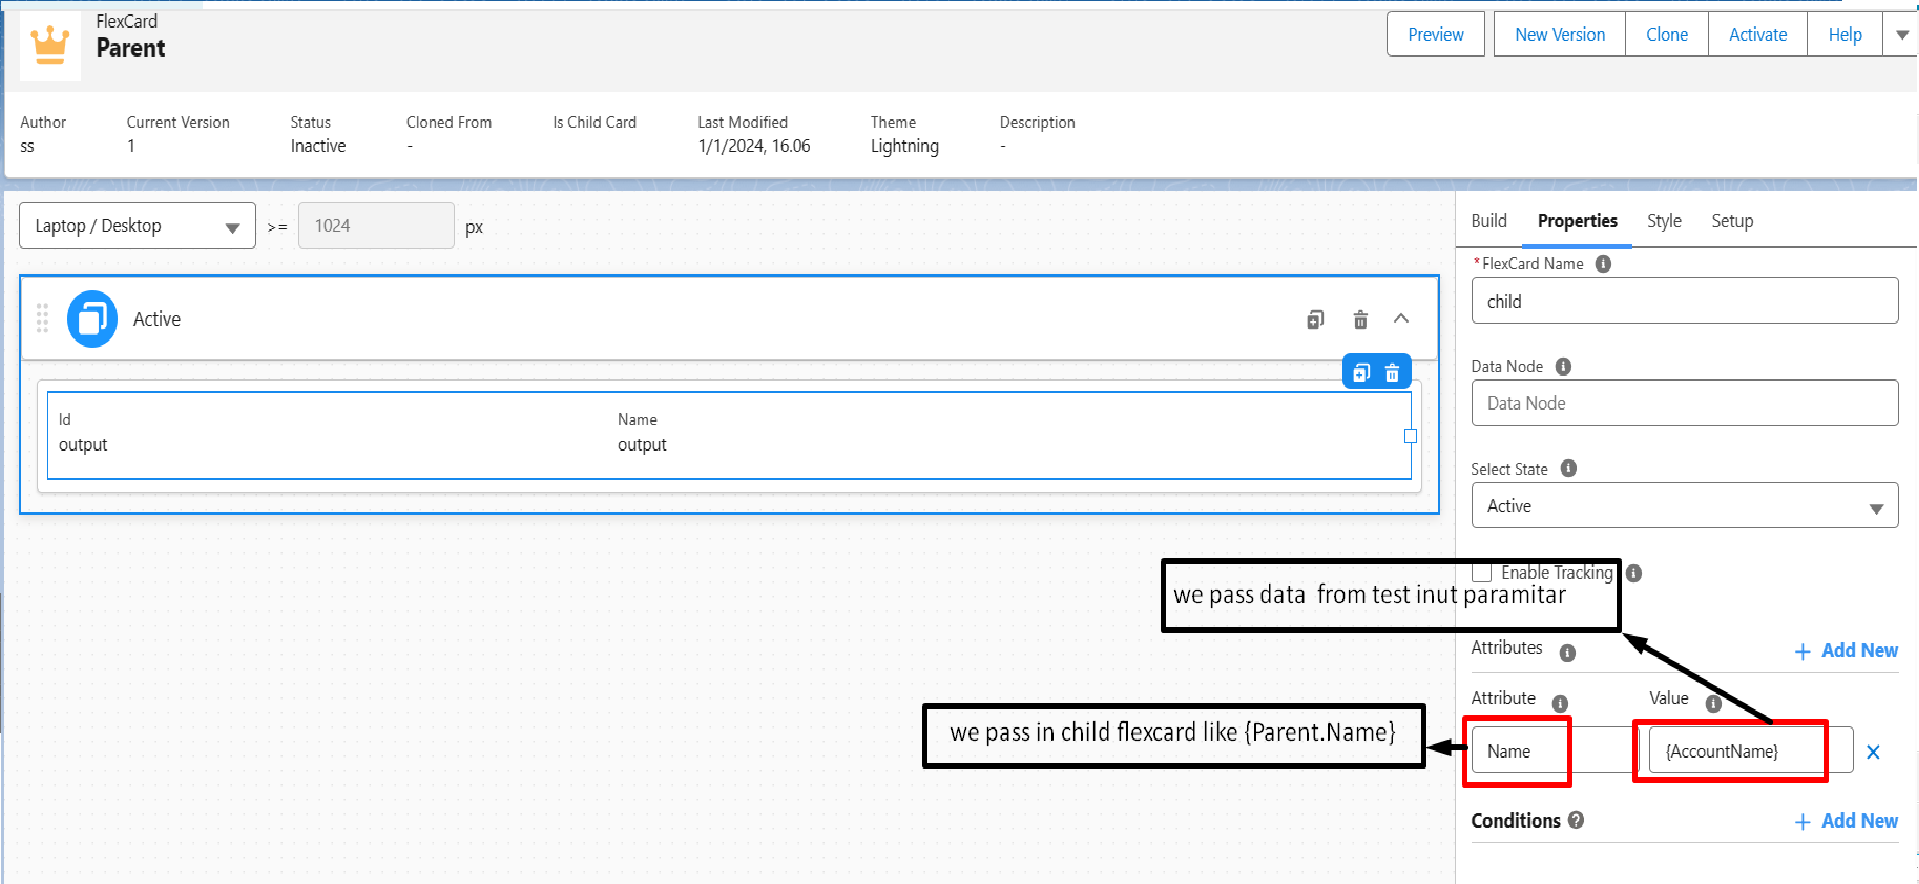
In Parent Card
On Parent Setup Panel
On parent flexcard preview tab
On preview tab
Step 3: Configure Parent FlexCard
Now, create the parent FlexCard:
Create a new FlexCard with a proper name and description
If required, define Attributes that will be passed to the child FlexCard
These attributes can include Account Name, Record Id, or other parameters
Step 4: Access Parent Data in Child FlexCard
To access data from the parent FlexCard inside the child FlexCard, use the following syntax:
{Parent.attributeName}
Replace attributeName with the actual attribute or data node name defined in the parent FlexCard.
This allows the child FlexCard to dynamically use values coming from the parent.
Step 5: Add Child Card Component to Parent FlexCard
In the parent FlexCard:
Go to the Build section
Drag and drop the CHILD CARD component onto the canvas
Select the child FlexCard name
Map attributes or data nodes as required
Once configured, the child FlexCard will render inside the parent FlexCard and display Account data accordingly.
Conclusion
Passing data from a parent FlexCard to a child FlexCard is a powerful feature in OmniStudio that helps build scalable and reusable UI components.
By using Data Nodes or Attributes, you can control how data flows between FlexCards and create flexible user experiences. This pattern is especially useful when working with Account details, related records, or contextual views within Salesforce.


Pingback: How to use Flexcard Context Variables (salesforce / vlocity)