

FlexCards in OmniStudio allow you to display dynamic, contextual data in a visually appealing way. Sometimes, you may want to launch a child FlexCard from a parent FlexCard using a button click. This is achieved using the Flyout action, which can open a child card as a modal or side panel.
In this article, we will explain step by step how to create a FlexCard with a button that launches a Flyout to display another FlexCard.
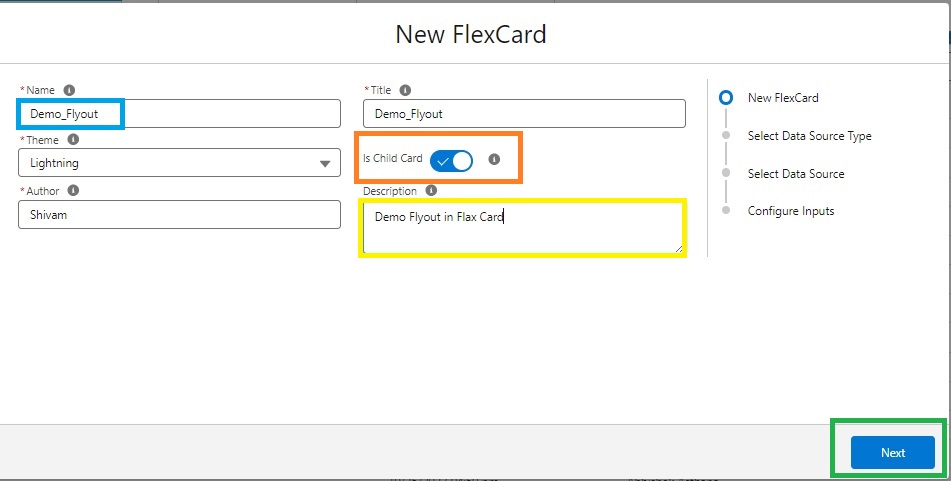
Step 1: Create a Child FlexCard
The first step is to create a child FlexCard that will be displayed when the Flyout action is triggered.
- Open FlexCard Designer and create a new FlexCard
- Provide a Name and Description for the child FlexCard
Click Save to create the card
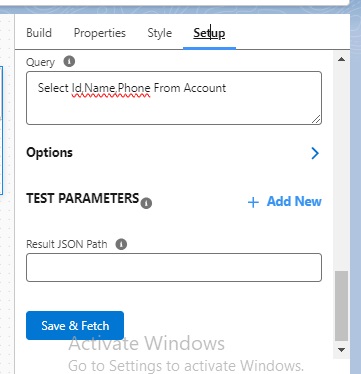
Step 2: Configure Data Source for the Child FlexCard
Next, configure the Data Source to fetch data for the child card.
- Go to the Setup tab
- Select Data Source Type
- Write a SOQL query to fetch the required records from Salesforce
- Click Save & Fetch
Once saved, the records will start appearing in the FlexCard preview.
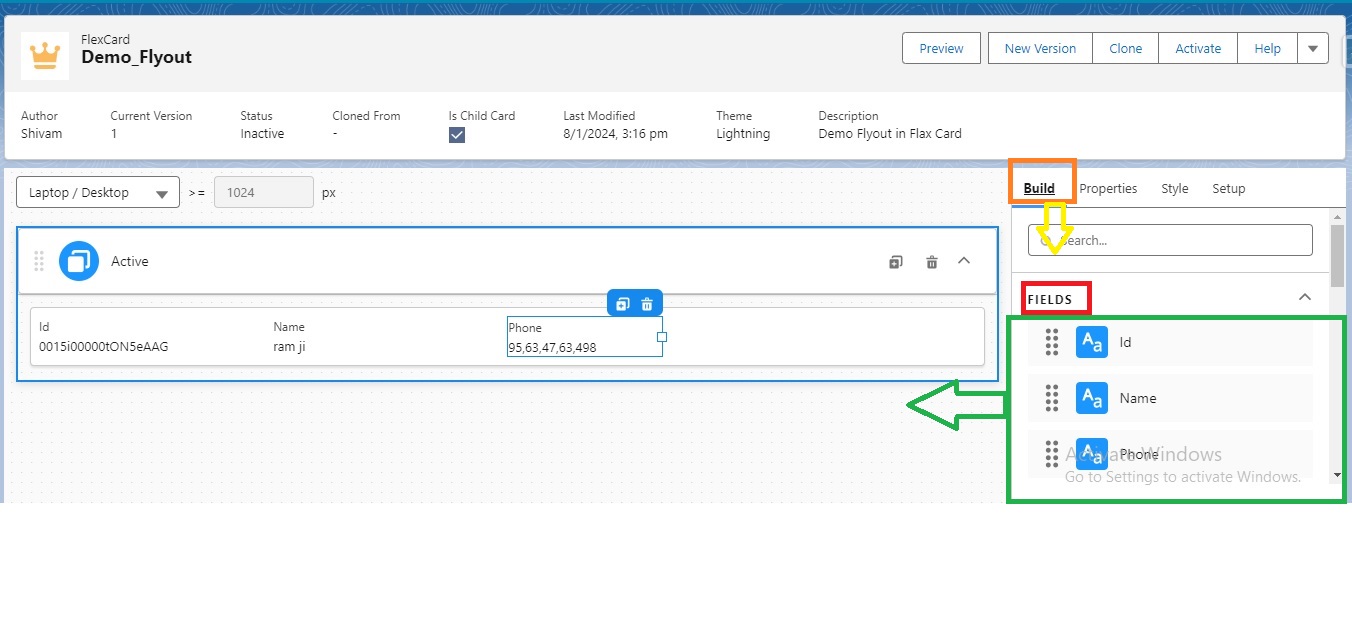
As soon as we click on Save and Fetch buttons, the records start getting displayed.
Then we click on the Build Options area and drag and drop the selected fields to the canvas, which displays all the records.
Then we create a parent flexchar and create an action button in it.
We create a Flex card with proper Name & Description. And Drag & Drop a Action Button.
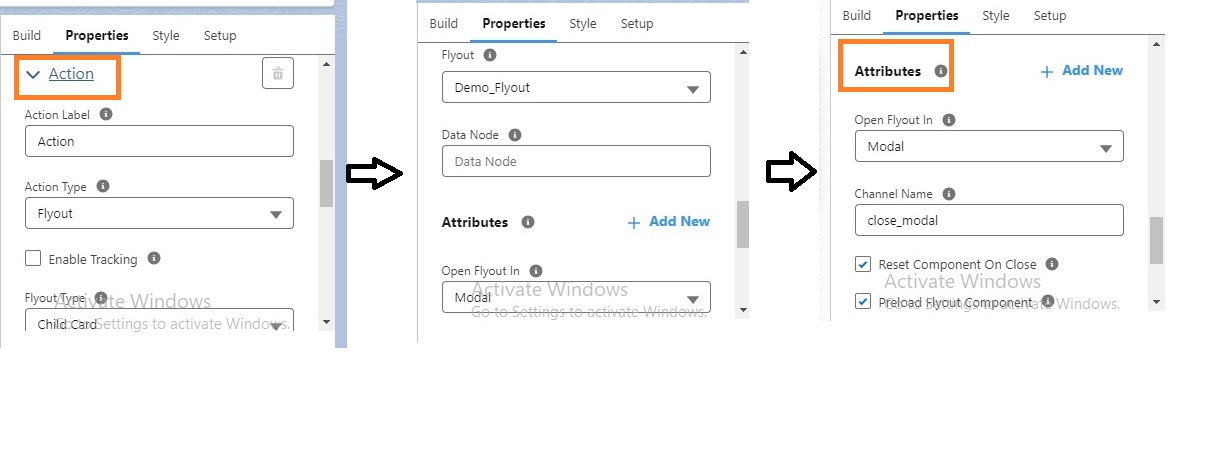
And we are going to action and select action type = flyout,
flyout type=Child Card,
flyout = Child Card Name,
Open flyout type=Modal,
Channel Name=Close_modal
File Action & Attributes Then we activate the flex card.
Note :-When selecting a Flyout make sure that the componentis Activated and Child Card is enabled (If it is a Flexcard). If the component is not activated or the Child card is not enabled, then the flyout will not display that component in the dropdown list.

Once the user clicks on the “More Details” button, it will launch the flyout modal and display the fields.

Step 3: Build the Child FlexCard UI
Now it’s time to display the fetched data on the child FlexCard:
- Go to the Build Options area
- Drag and drop the desired fields onto the canvas
- Arrange them to display all necessary information
At this stage, the child FlexCard is ready with its data and layout.
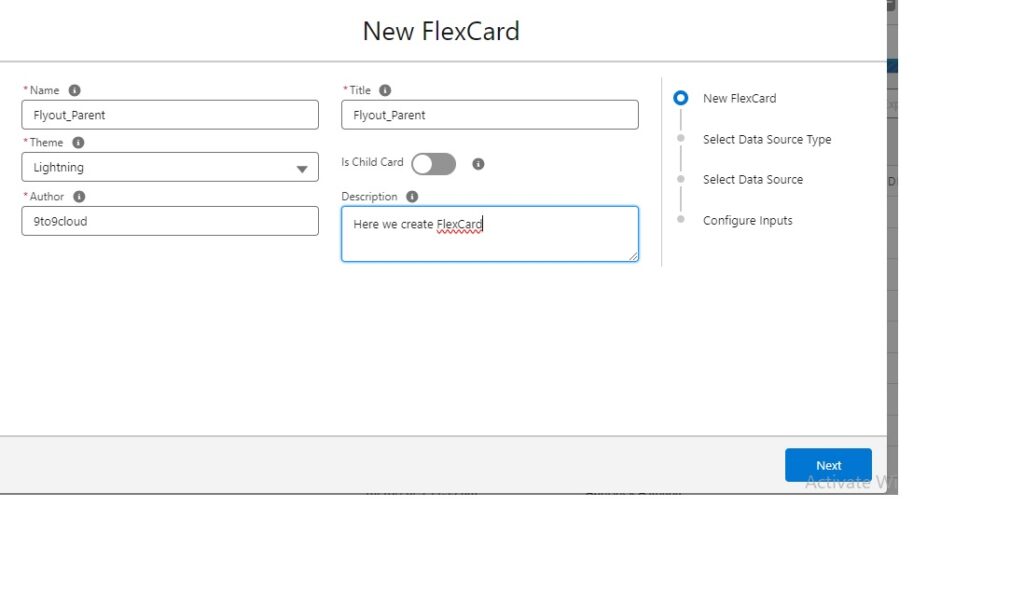
Step 4: Create a Parent FlexCard
Now, create a parent FlexCard that will contain the button to launch the Flyout.
- Create a new FlexCard with a proper Name and Description
- Drag and drop an Action Button onto the parent FlexCard canvas
Step 5: Configure the Action Button to Launch Flyout
Configure the button to open the child FlexCard:
- Select the Action Type as Flyout
- Set the Flyout Type to Child Card
- Choose the Child Card Name you created earlier
- Set the Open Flyout Type as Modal
- Optionally, set Channel Name to Close_modal if you want to control modal closing behavior
- Fill in any additional Action Attributes
Step 6: Activate the FlexCards
Before the Flyout will work:
- Ensure that both the parent and child FlexCards are activated
- Make sure the child card is enabled in the FlexCard component settings
Note: If the component is not activated or the child card is disabled, it will not appear in the Flyout dropdown list.
Step 7: Preview and Test the Flyout
Once everything is set up:
- Preview the parent FlexCard
- Click on the “More Details” button (or the button you configured)
- The child FlexCard will open in a Flyout modal, displaying the fields you configured
This allows users to see detailed information without navigating away from the main card.
Best Practices
- Always give a meaningful name to your child FlexCard for clarity
- Ensure the SOQL query is optimized to avoid slow loading
- Test modal behavior on different devices to ensure responsiveness
- Use channels if you want to control multiple modal interactions
- Keep child FlexCard layout simple for quick loading
Use Cases
Using Flyouts in FlexCards is ideal for:
- Displaying detailed account or contact information
- Showing related records without leaving the parent card
- Quick approval or review actions
- Enhancing user experience in dashboards or service consoles
Conclusion
Launching a Flyout in FlexCard using a button is a powerful OmniStudio feature that allows nested, contextual data display. By configuring a parent FlexCard with an Action Button and linking it to a child FlexCard, users can access additional details quickly, improving both usability and efficiency.
With proper setup of Data Sources, Flyout configuration, and activation, this approach can enhance any OmniStudio interface with dynamic, interactive data views.