

Adding a custom icon to a Salesforce tab makes your org look more personalized and professional. It helps users visually identify tabs faster and creates a polished user experience. While Salesforce provides default icons out of the box, using your own custom icons can reinforce branding and improve navigation clarity.
In this guide, we’ll walk you through a step-by-step process to upload and assign custom icons to your Salesforce tabs. These instructions apply to users with administrator access and should be followed carefully for a smooth outcome.
Why Add a Custom Icon to Your Salesforce Tab?
Custom icons enhance usability and brand consistency across your Salesforce interface. Icons are especially useful in orgs with many custom objects or apps, where visual recognition improves efficiency. A well-chosen icon lets users quickly locate specific areas of your system without relying solely on text. In modern Lightning Experience, tailored icons contribute to a cleaner, more intuitive UI that aligns with your organization’s style and workflows.
🔹 Step 1: Upload Your Icon
- Switch to Salesforce Classic – Click your profile photo → Switch to Salesforce Classic.
- Open the Documents Tab – Click the “+” icon on the top bar → find Documents.
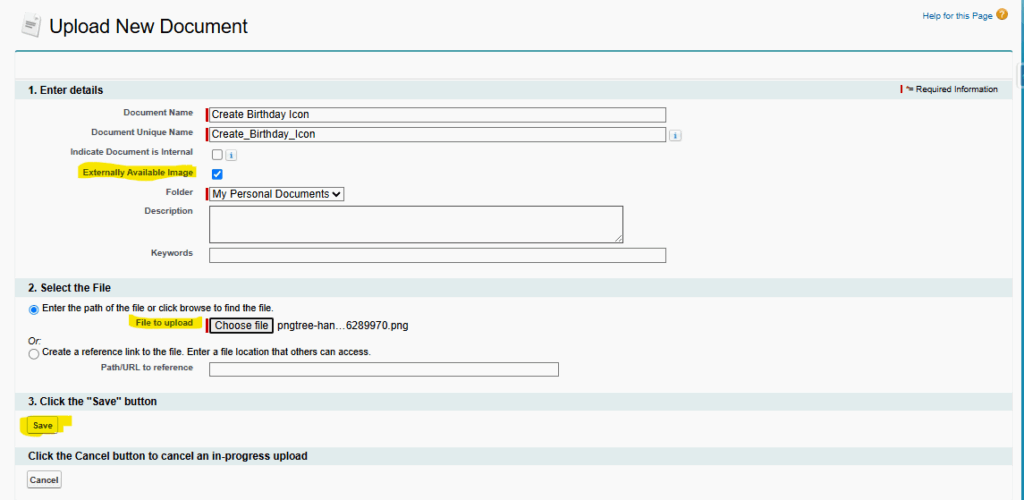
- Create a New Document – Click New, enter the Document Name, select a Folder, and check Externally Available Image.
- Upload Your Icon File – Choose your image (under 20 KB for best performance) → click Save.
🔹 Step 2: Assign the Icon to Your Custom Tab
- Switch back to Lightning Experience.
- Go to Setup → Quick Find → Tabs.
- Under Custom Object Tabs, click New (or edit an existing one).
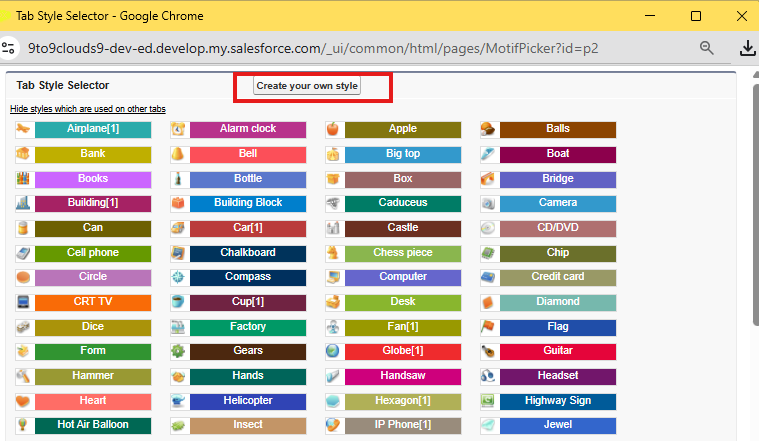
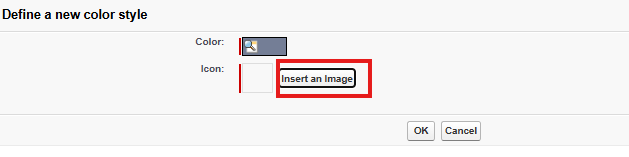
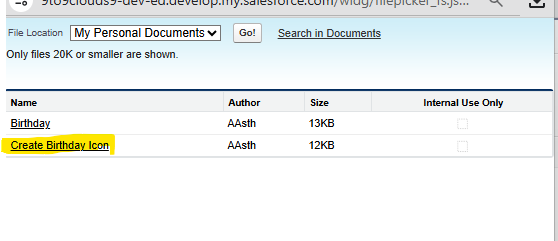
- Select Create your own style → choose the uploaded Document image.
- Click Save.
🎉 Step 3: View Your Custom Tab
Open your custom object tab in Salesforce — your personalized icon now appears beautifully beside the tab name!

Best Practices for Custom Tab Icons
Use Appropriate Image Formats and Sizes
Typically, Salesforce tab icons work best when they are optimized for web usage. A lightweight PNG or SVG that’s visually clear at small sizes ensures fast loading and crisp display. Keeping files under 20 KB is recommended to avoid performance delays.
Maintain Consistency Across UI Elements
Your custom icons should match your overall Salesforce color scheme and styling standards. This creates a cohesive visual experience that aligns with your UI design and reduces cognitive load for users.
Follow Naming Conventions
When uploading multiple icons, use descriptive names that clearly identify their purpose. This practice helps administrators and developers maintain clarity when selecting icons for future tabs.
Troubleshooting Common Issues
Icon Not Appearing
If your custom icon doesn’t display next to the tab after completing the configuration, first ensure that the image was marked as Externally Available during upload. If it still doesn’t appear, try refreshing your org or checking if permissions are properly configured for document visibility.
Compatibility Across Editions
Custom tab icons display in both Classic and Lightning Experience; however, the exact steps may differ slightly depending on your org’s configuration and feature availability. Custom object or web tabs generally need to be linked properly to the apps where they should appear.
Conclusion
Personalizing Salesforce navigation with custom tab icons enhances both aesthetics and usability, making it easier for users to find and interact with objects that matter most. By following the simple steps above, administrators can upload icons, assign them to tabs, and ensure that your org delivers a more polished and professional user experience.
Ready to take your Salesforce UI to the next level? Start with well-designed icons, consistent naming, and clear organization — and watch how these small improvements make a big difference in daily usability.