Integration Procedures > LoopBlock > DataRaptorExtractAction > ResponseAction
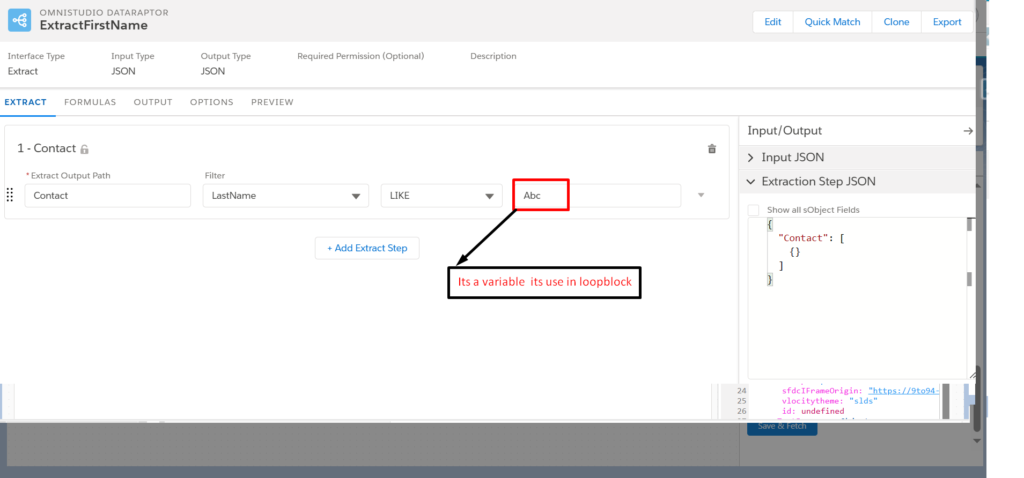
Step 1: Create an ExtractDataRaptor:
- Create a new ExtractDataRaptor. This DataRaptor is designed to extract data from contact.
/*! elementor – v3.18.0 – 20-12-2023 */
.elementor-widget-image{text-align:center}.elementor-widget-image a{display:inline-block}.elementor-widget-image a img[src$=”.svg”]{width:48px}.elementor-widget-image img{vertical-align:middle;display:inline-block}

Step :– 2 Create an Integration Procedure:
- Begin by creating a new Integration Procedure in your development environment.
Drag a LoopBlock:
- Drag and drop a LoopBlock component into the structure panel of your Integration Procedure.
Configure LoopBlock Parameters:
-
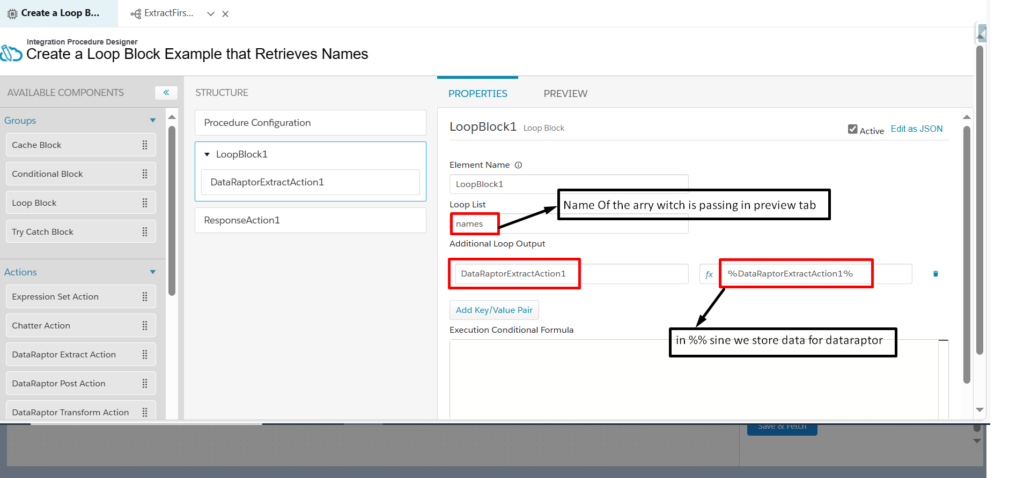
In the LoopBlock configuration, set the following parameters:
-
Loop List: Specify the node of the array or list that you want to iterate over. This represents the data source for the loop.
-
Additional Loop Output: Use the %% sign and provide a name associated with the DataRaptor or variable that will store additional loop output.
-

Step :– 3 DataRaptor in LoopBlock:
- Within the LoopBlock in your Integration Procedure, configure a DataRaptor action to perform operations during each iteration.
Configure DataRaptor Parameters:
-
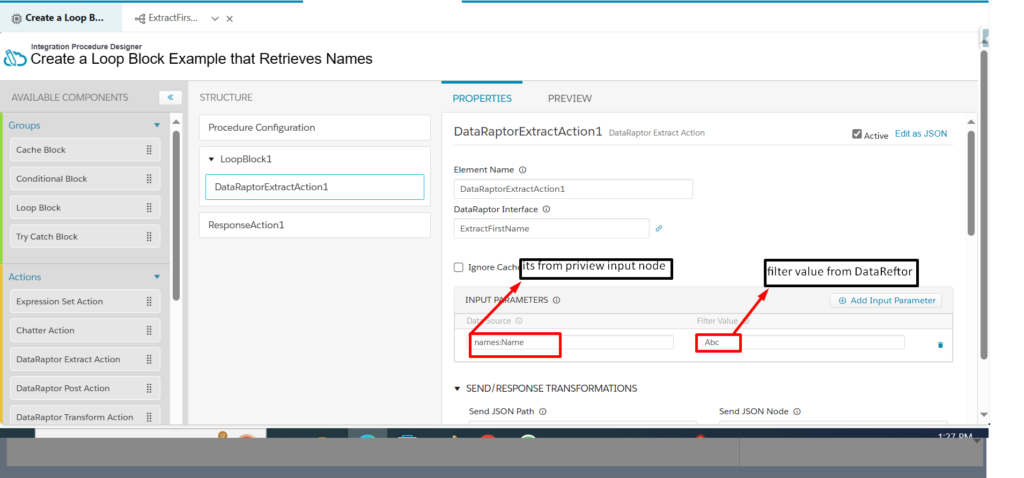
Set the following parameters in the DataRaptor configuration:
-
Data Source: Specify the node from the input obtained from the Preview Tab.
-
Filter Value: Use a variable from the DataRaptor for the filter value.
-

Step :– 4 In ResponseAction:
- Within the Integration Procedure, locate the ResponseAction component.
Configure Additional Output:
- In the ResponseAction configuration, set the “Additional Output” to the name of the LoopBlock.

Step :– 5 On Preview Tab

Salesforce Gide = https://help.salesforce.com/s/articleView?id=sf.os_loop_block_properties.htm&type=5
